-Facebook Nails-
Hi guys! Today I'll make a special nail tutorial for you. I guess you all have a Facebook account or if not you've surely heard of it :>. I love this concept and I hope you'll love it too. SO, let's get started !
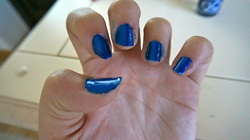
1) FIRST STEP. After you've applied a protective laquer , and you're sure that your nails are fully protected , apply a dark blue . I like using a metallic blue , because I like the contrast between it and the lighter blue . If you've done a little mess in the corners , don't worry, just remove it gently using a stick .
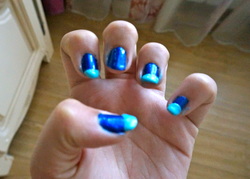
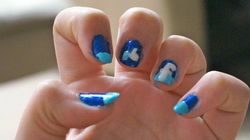
2) SECOND STEP. Draw a thick light blue line at the bottom of your nails . Take your time at this step , because it has to be quite perfect . An easier way to create a perfect thick line is to keep your hand completely rested on the table , while rotating the finger you're working on. Do this to all of your nails , except the middle one like in the image .
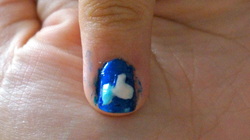
3) THIRD STEP . Like button. All you have to do is to make a hand like the one I did here with white nail polish .After it's dried color the bottom of the hand with your light blue . Don't hurry , take your time! Use a thin brush to this part .
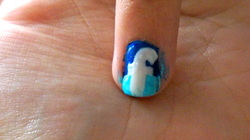
4) FOURTH STEP. Draw an "F" on your ring finger .It seems difficult , but it's really simple. Using a thin brush draw a thick line from the bottom of your nail to the half of it , then do a curved line to the top of your straight line and a shorter line over the biggest one . And that's it! Your perfect "F" :)
Apply a top coat to add some beautiful shine to your special design. And you're done ! Your gorgeous facebook nails are done :) I hope you guys liked doing them and please share with us your own facebook nails :) Send us your beautiful nails on our mail or post them on our facebook page :)- https://www.facebook.com/wewriteyouenjoy
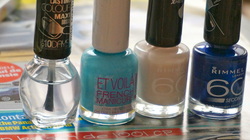
What I used in this tutorial:
- Rimmel London - dark metal blue.
-Rimmel Lomdon - nude white
- Miss Sporty - light blue
-Miss Sporty - top coat
- Rimmel London - dark metal blue.
-Rimmel Lomdon - nude white
- Miss Sporty - light blue
-Miss Sporty - top coat
-Hairstyle-
Ok , so you guys wanted us to do a hairstyle tutorial. Ok, let's get started! I'll do a top three hairstyles that fit best this season .
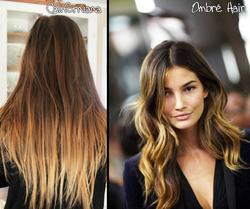
1) Ombre Hair. I reaaally like this look ! It means you colour your hair from a darker colour to a lighter one. How awesome is it? :) Ok now I'm gonna teach you how. Firstly you should colour your hair one dark colour. Then , after it's dried apply a lighter colour half of your hair. I know it seems a little bit hard but trust me , it's really simple :). After your hair is done, put some bleaching on the top of your hair . And that's it :) . You should look really amazing now !
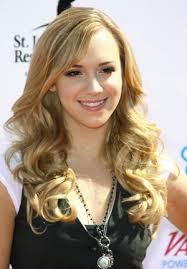
2) Curly Natural Hair. I really love curls , aren't they soo cool? But I like most natural ones because they don't make your face seem so painty. Ok, so I'll teach you how to do them soo simple. All you're gonna need is a straightener and some clips. Take your straightener and put it near the top of your hair. Roll your hair around the straightener from the bottom to the top . Catch it up with a clip. Do the same to the rest of you hair. Let it like this about a half an hour , then take off the clips. Brush your hair and that's it . Your natural curved long hair is done !

3) Hair Bow. How sweet is a bow in your hair? I'm lovin' it. I'm gonna teach you now how to do the easiest hair bow. Firstly , you have to do a ponytail and instead of pulling the ponytail all the way through , create a loop using about half of the hair , leaving a long loose end. Then, divide your hair into two evenly distributed sections and take the loose of your strand hair in the front of the bow and then pull it back over and through the middle of your sections. Shape your bow to look as you want , if it doesn't hold as you want , use an extra-hold hairspray and that's it! Now your bow is shining and your hair looks soo cool :) .
I hope you guys liked this tutorial and let me know if I should do something else. I'm looking forward to seeing your feedback and see ya :).
